“Yimby Tumbler Composter – The #1 tumbling composter on Amazon.com”
This is a pretty big accolade from a company like Forest City who specializes in nothing but composters, rain barrels, and planters.
Not to mention, this is quite the feat in a market that continues to produce more and more
But the price tag of this composter can make you take pause. Normally priced around $75, everyone asks the same question:
Is the Yimby Tumbler Composter worth the cost?
The rest of this post is dedicated to answering this question and other questions you may have when buying this composter.
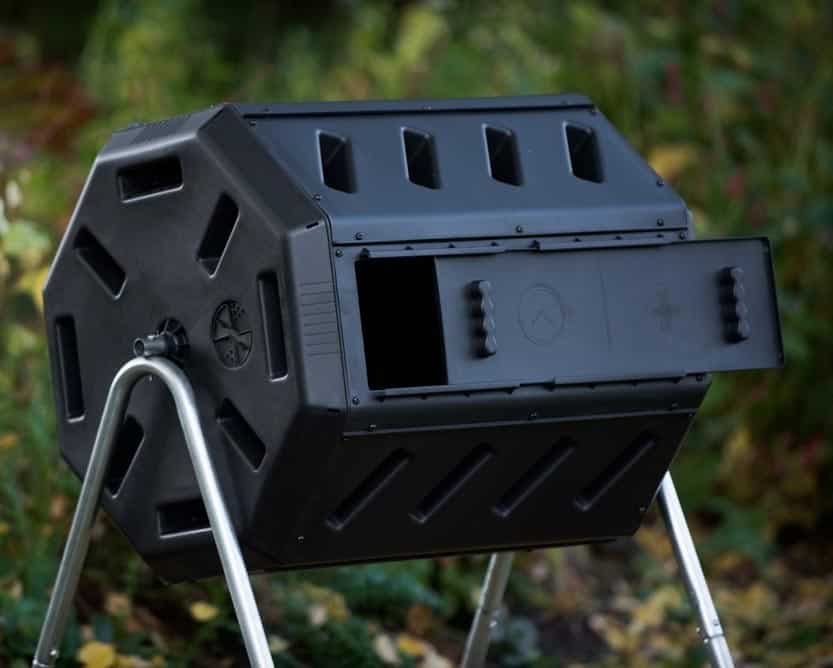
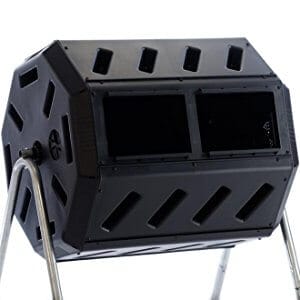
Yimby Tumbler Composter
Dimensions
- 36″ x 21″ x 28″
- Weight: 26.8 lbs
- Capacity: 37 gallons
- Color: Black
- Model: IM4000
Pros
- Dual Chambers
- Affordable
- Steel frame
- Durable, BPA-Free Plastic
- Compost Time – 2 weeks
- Pest-Control
Cons
- Requires Assembly
- Small Opening – hard to put large waste in
- Sometimes can leak from all the aeration holes
5 Reasons the Yimby Tumbler Should be Your Next Composter!

#1: It ONLY Takes 5 Minutes to Use!
Have you ever used a traditional composter before?
If you haven’t, let me save you a frustrating experience.
To start off, it’s messy and clumsy trying to get scraps and clippings into the composter.
And you might as well need a degree in composting to figure out how to remove the compost in an efficient and effective manner.
The Yimby Tumbler Composter is PERFECT for beginner composters or those who have small gardens.
Specifically, it is incredibly easy to use no matter if this is your first time gardening or if you are a seasoned pro.
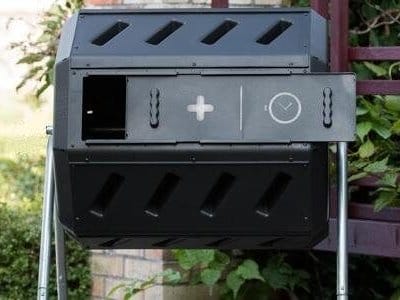
The large openings and removable door make it easy to add scraps/clippings and remove finished compost.
In addition, the handholds provide an excellent grip for turning your compost and moving it to other areas of your yard.
What’s the best part about the Yimby Tumbler?
Not only does it take 5 minutes a week to use, but it takes 5 minutes to assemble. Even bad assemblers like me won’t have a problem!
#2. Tumbling Makes Composting BETTER!
While shopping for composters, it’s important to pay attention to whether it is stationary, tumbling, or rotating. It’s one of the most important technical specifications for composting.
While any composter is good, the tumbling composters are literally the most effective!
Why does it matter?
Tumbling may not seem like a major specification for composting unless you have a traditional composter.
With traditional composting, you have to first dig a hole and then place your traditional composter in it.
If you ever want to remove it, you better have a six-pack of beer ready for a few of your neighbors.
Once it’s time to mix your compost you then need your hands or a pitchfork to toss and turn the scrapping and clipping every few days.
This is not only time consuming, but can be messy, tiring, and is the slowest way to compost.
This is not something most beginning gardeners have an interest or time in doing.
Tumbling takes the thinking out of composting.
The Yimby Tumbler Composter allows you to avoid the hard digging and manual mixing.
In addition, the tumbling design makes mixing easy and efficient. All you need to do is close the door and turn it several times every couple of days.
If the conditions are right and you are lucky, it can finish composting in as little as 2 weeks.
The reason for this is that oxygen circulates more efficiently, breaking down waste faster!
This is much quicker than 3-4 months traditional composting may take.
#3. Two Composter Chambers = More Compost!
The Yimby Tumbler eliminates this problem.
It has two separate chambers that allow you to begin composting in one
Therefore, this allows for a
The beauty of the Yimby Tumbler is that is it 37 gallons or 5
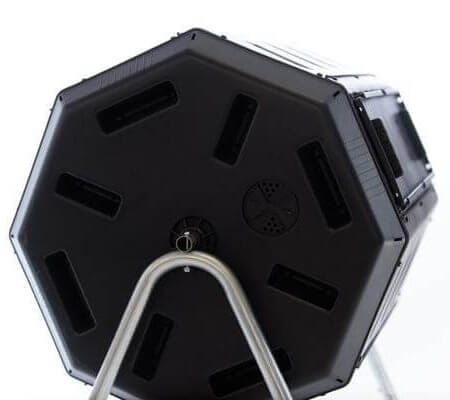
#4. Excellent Aeration = Better Composting
What is it and why is it important?
Very simply, aeration is when
While all composters have some type of aeration, this is one feature that should not be underestimated.
From my research and product trials, the Yimby Tumbler has one of the best aeration systems around.
The excellent aeration holes, as well as the fins, break up the material inside in a way that mixes more oxygen into the compost than other competitors.
In addition, tumbling naturally provides a more consistent and efficient way of aerating your compost than by hand (required by traditional composters).
#5. Durable Construction = Lasts Forever!
If you are going to invest in a product, shouldn’t it be durable?
The Yimby Tumbler is so durable it may be the only composter you ever need.
Even if you own it for 10 years, at $75 you are paying less a year ($7.50 a year for 10 years) than some people pay for coffee a day!!!!
The Yimby Tumbler is made with a steel frame that is resistant against corrosion (huge if you are going to receive lots of rain and snow like me).
In addition, Forest City cares about its consumers.
The composter is BPA free and is made from recycled polypropylene that will not wear away from sunlight (no matter how much you get).
Frequently Asked Questions
#1. How do you Use a Tumbling Composter?
Below, are step-by-step instructions for composting with the Yimby Tumbler Composter.

Step 1:
Assemble your composter.
This should literally take you about 5 minutes.
Honestly, assembling other composting methods will take you much longer.
After assembling your composter, you will want to start off by adding waste. You will want to add both brown and green waste to just one compartment.
Good examples of green waste include green grass, vegetables, and fruits. Good examples of brown waste include leaves, twigs, and wood clippings.
Some waste that I have personally used is coffee grounds, eggshells, tomatoes, apples, bananas, and so much more.
Do not add waste like meat, feces, or dairy products. These not only slowly decompose, but can be harmful to you and your plants.
If you are composting in the spring or summer you will want to have a 1 to 1 ratio of brown to green waste.
If you are composting in the winter, I recommend having more brown waste than more.
A good mixture would be a 2 to 1 ratio of brown to green waste.
You need a higher mixture of brown to break down the extra water that will be produced by the green waste in the winter.
Step 2:
Once a week you will want to spin your composter.
Each week I would spin it about 5-7 times. This will ensure the waste is mixing and composting properly.
You’ll notice this composter is sealed so tight you literally won’t have to worry about mother nature ruining your compost.
One of the biggest reasons composters fail is because of too much water or too much cold.
Depending on the time of year you may only need 2 weeks for your waste to compost. Odds are though it will take 3 to 4 weeks.
This is much quicker than the 3 to 4 months traditional composters take.
The reason it is so much quicker is that
It is also elevated meaning it is off the potentially cold ground.
A good fact to remember is that the colder your composter is the slower waste will decompose.
You will know your compost is ready when it looks like finely grated soil.
If your waste is not composting fast enough then I recommend purchasing a compost starter/accelerator! It will speed up the composting process.
Step 3:
About 2 weeks into composting you can now add food waste into the second compartment. I recommend repeating step 1 for the best results.
If you are interested in learning more about the best food waste then I recommend reading my article:
Step 4:
When your compost is ready, simply empty your compartment into a pot or wheelbarrow.
Then add this to your garden and plants.
Remember, having an understanding of what nutrients your plants need is essential for composting!
You can repeat this for the second compartment about two weeks later.
And finally, continue doing this all 4 seasons for a fast and easy way to replenish your soil’s nutrients.
Conclusion and Other Resources:
The Yimby Tumbler Composter is by far one of the best composters on the market and for the price, is my favorite.
If you are interested in composting the tumbling composter will be your most efficient and effective option!
Whether you are an advanced gardener looking for a great compost bin or a novice with a small garden you cannot go wrong by purchasing it.
Not only this, but it should be mentioned that this is an incredibly easy product to clean. Literally, remove the panels and use a hose to spray the waste. It’s that easy!
Remember, part of what makes composting effective is what you put in it. What is also important is that you follow step-by-step instructions to ensure your compost properly.
It has everything you need and want:
- Composter shopping should be easy. Don’t kill yourself spending long nights researching when you can be spending more time in your garden. Research one or two sites and make a purchase. Purchasing a composter is one of the best purchases you’ll make for your garden.
- It is simple, simple, simple. Whether you are a beginner or advance gardener composting with this product won’t take you more than 10 minutes.
- Being a tumbler with two chambers, the Yimby Tumbling composter allows you to compost more, quicker!
- Tumbler composters are more effective since oxygen is able to decompose waste quicker
- There is nothing worse than buying a product with a short life or having to upgrade all the time. You won’t run into that with this composter.
So I bought my composter, Now What?
Read the below articles:
Best Tillers for ALL Gardening Needs
Winter Composting (10 PROVEN Tips)
Ultimate Composting Guide: What to Compost